
Banner Notifications
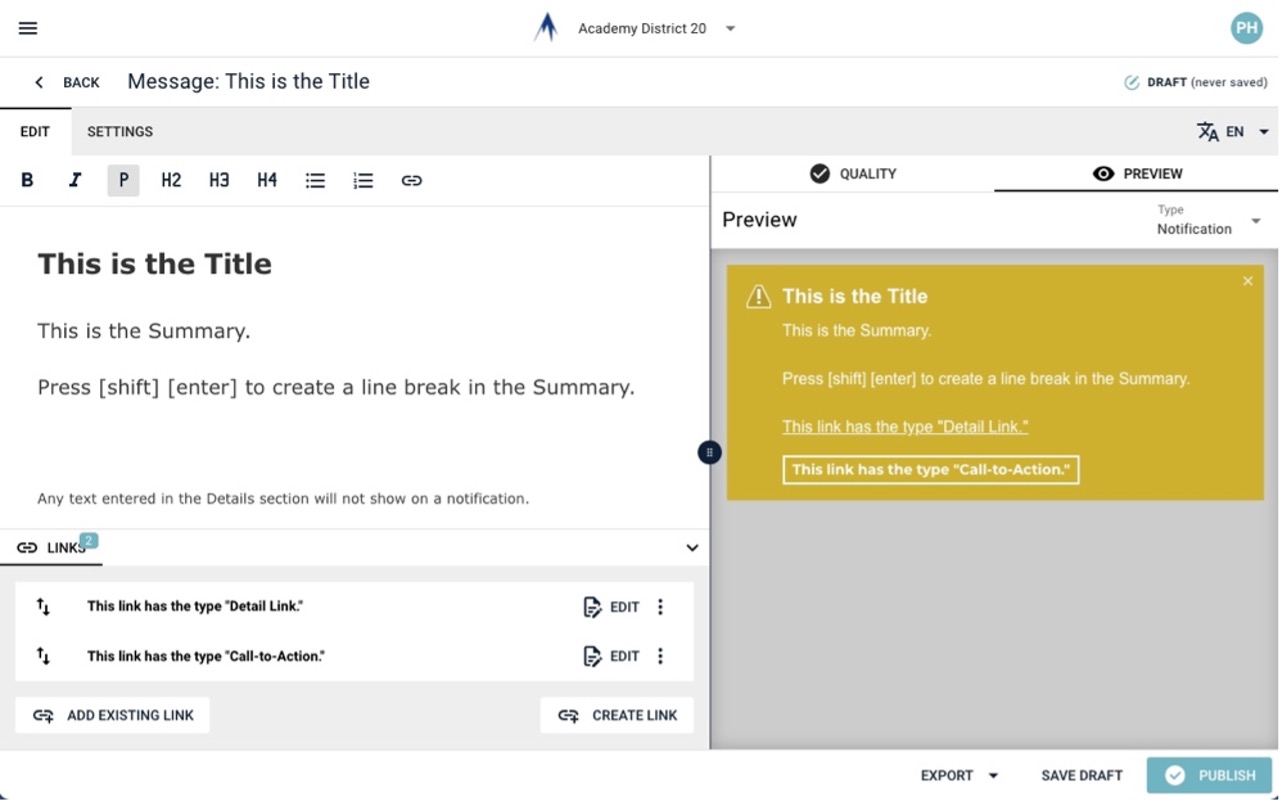
- Select Academy District 20 in the organization chooser. Notification routes and publishing are restricted to the district organization. Then go to Notifications and choose one of the three banner types.
- Choose New or choose an existing notification to edit.
- Make sure the Edit tab near the upper left is active.
- Enter the Title for the notification.
- Enter the Summary for the notification.
- To add a line break in the summary for longer text, press [shift] and [enter].
- Summary text does not allow links.
- Notifications do not use the Details section of the message. Any text entered here will not be shown
- To add a link, click the Links button near the bottom left.
- Links with the type Call-to-Action will appear as a button on the notification.
- Links the type Detail Link will appear a regular link at the end of the summary. If you use this type of link, make sure your summary has a period and an extra space at the end.
- Links with the type Link are not shown on notifications.
- If the needed link has already been made, use Use Existing Link. Make sure the link has the proper type, which is shown with each existing link.
- Add a new link using Create New Link as needed. Make sure the display type is set correctly.
- Use the Preview button near the upper right to see how the notification will appear.
- Switch to the Settings tab near the upper left.
- Set the publish and expiration dates and times for the notification.
- Click on the Destinations pull-down menu and select the website(s) or destination group where the notification will appear. The District Wide option includes the district and all school websites.
- Click the Publish button at the lower right.