
Floating Notifications
- On the left side menu of the CommCenter, go to Notifications and choose Floating Notifications.
- Choose New or choose an existing notification to edit.
- Make sure the Edit tab near the upper left is active.
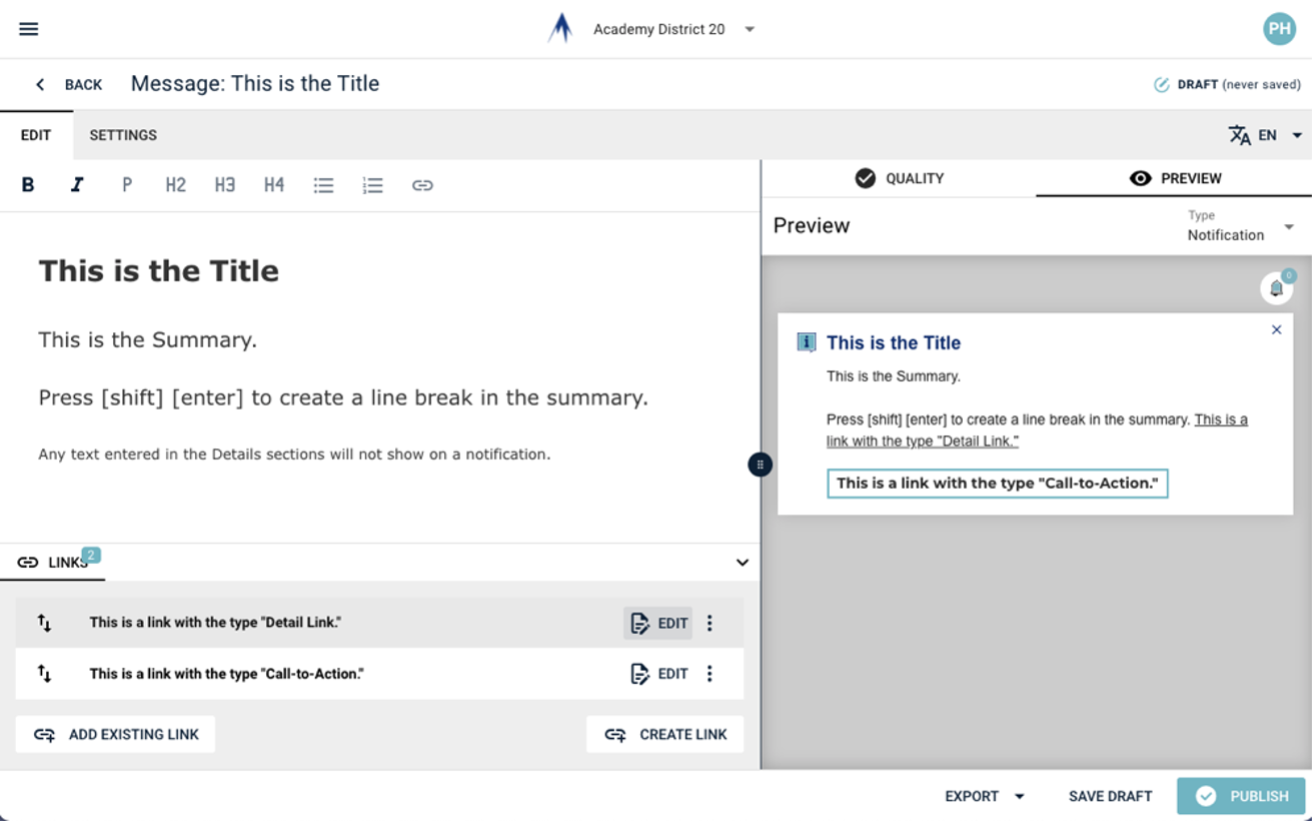
- Enter the Title for the notification.
- Enter the Summary for the notification.
- Notifications do not use the Details section of the message. Any text entered here will not be shown.
- To add a line break in the summary for longer text, press [shift] and [enter].
- Summary text does not allow links.
- To add a link, click the Links button near the bottom left.
- Links with the type Call-to-Action will appear as a button on the notification.
- Links the type Detail Link will appear a regular link at the end of the summary. If you use this type of link, make sure your summary has a period and an extra space at the end.
- Links with the type Link are not shown on notifications.
- If the needed link has already been made, use the Add Existing Link button. Make sure the link has the proper type. This is denoted in parentheses on the existing links list.
- Add a new link using the Create Link button as needed. Make sure the type of link is set as needed.
- Use the Preview button near the upper right to see how the notification will appear.
- Switch to the Settings tab near the upper left.
- Set the publish and expiration dates and times for the notification.
- Click on the Destinations pull-down menu and select the website(s) that the notification will appear on. The District Wide option includes the district and all school websites.
- Click the Publish button at the lower right.